Some classes require software only available in computer labs. These may be accessed remotely if permitted by software licensing agreements and approved by the appropriate academic department.  

Step-by-step guide

Windows Instructions

  1. Download and install the VMware Horizon Client on your personal computer  (the install file is usually located in the download folder)
    Download Folder

  2. Reboot your computer

    Restart Now

  3. Open the Horizon Client, click the “New Server” button, and enter: Desktop.pccc.edu
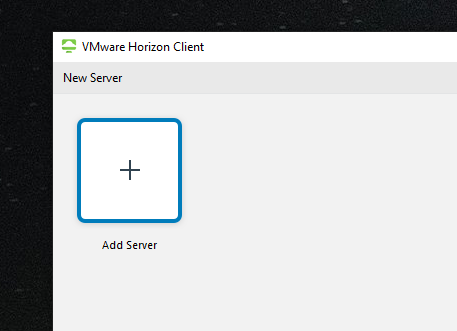
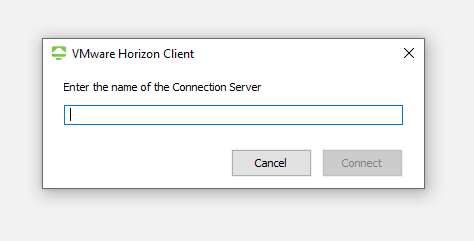
    VMware Horizion IconAdd Server boxserver name input window

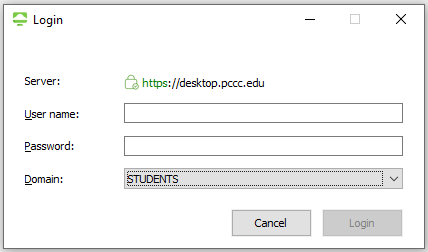
  4. Set the Domain to: STUDENTS

  5. Login with your PCCC user name and password

  6. Right-click on the Desktop Pool icon, and ensure PCoIP is selected
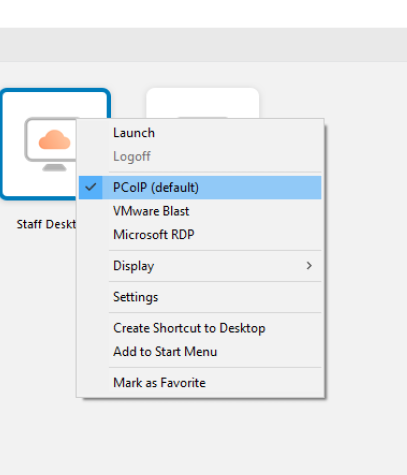
    PCoIP setting on right-click

  7. Double-click the icon to launch your VDI desktop


Mac Instructions

  1. Download the Horizon Client for Mac

  2. Double click on the VMware Horizon Client.dmg file to begin the install
    VMware download file
  3. Click “Agree” in the user license agreement window that appears.

    End User Agreement Window
  4. When the VMWare Horizon Client window appears, drag the “VMWare Horizon Client icon to the Applications folder.

    Installation Screen
  5. The first time you launch the VMWare Horizon Client, you may see a security popup asking if you want to open the file. Click the “Open” button.

    Security popup
  6. When you open up VMware Horizon Client click “New Server” or “+”

    New Server Window


  7. Type in Desktop.pccc.edu and click “Connect”.

  8. Make sure the Domain is set to “STUDENTS” and enter your Username and Password.

  9. Select VMware Horizon Client > Preferences from the menu bar and click PCoIP

PCCC Technology Support


You may also want to use visual panels to communicate related information, tips or things users need to be aware of.

Related articles

Related articles appear here based on the labels you select. Click to edit the macro and add or change labels.


Related issues